-

Infiniteguess


 2022-07-19 18:08:37 UTC
ㅤ
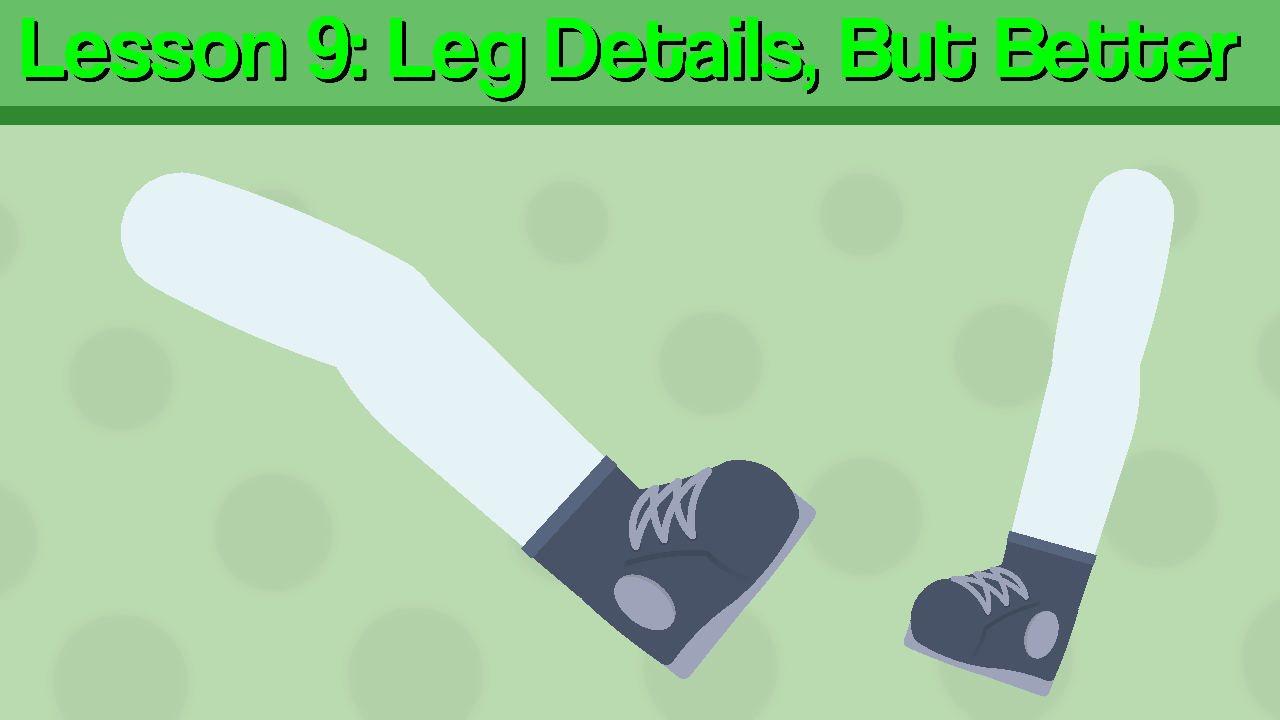
Hello again, it has been another 4 months since I’ve done one of these, but now I’m going to start fresh, this is not scheduled, so don’t expect me to make one every week or so, I’ll make it when I feel like it, or if there’s a high demand for a specific guide.Anyways, I’m going to be redoing the first guide I made, Leg details. I will be using one of my figures as an example and will explain the process step-by-step.
ㅤ
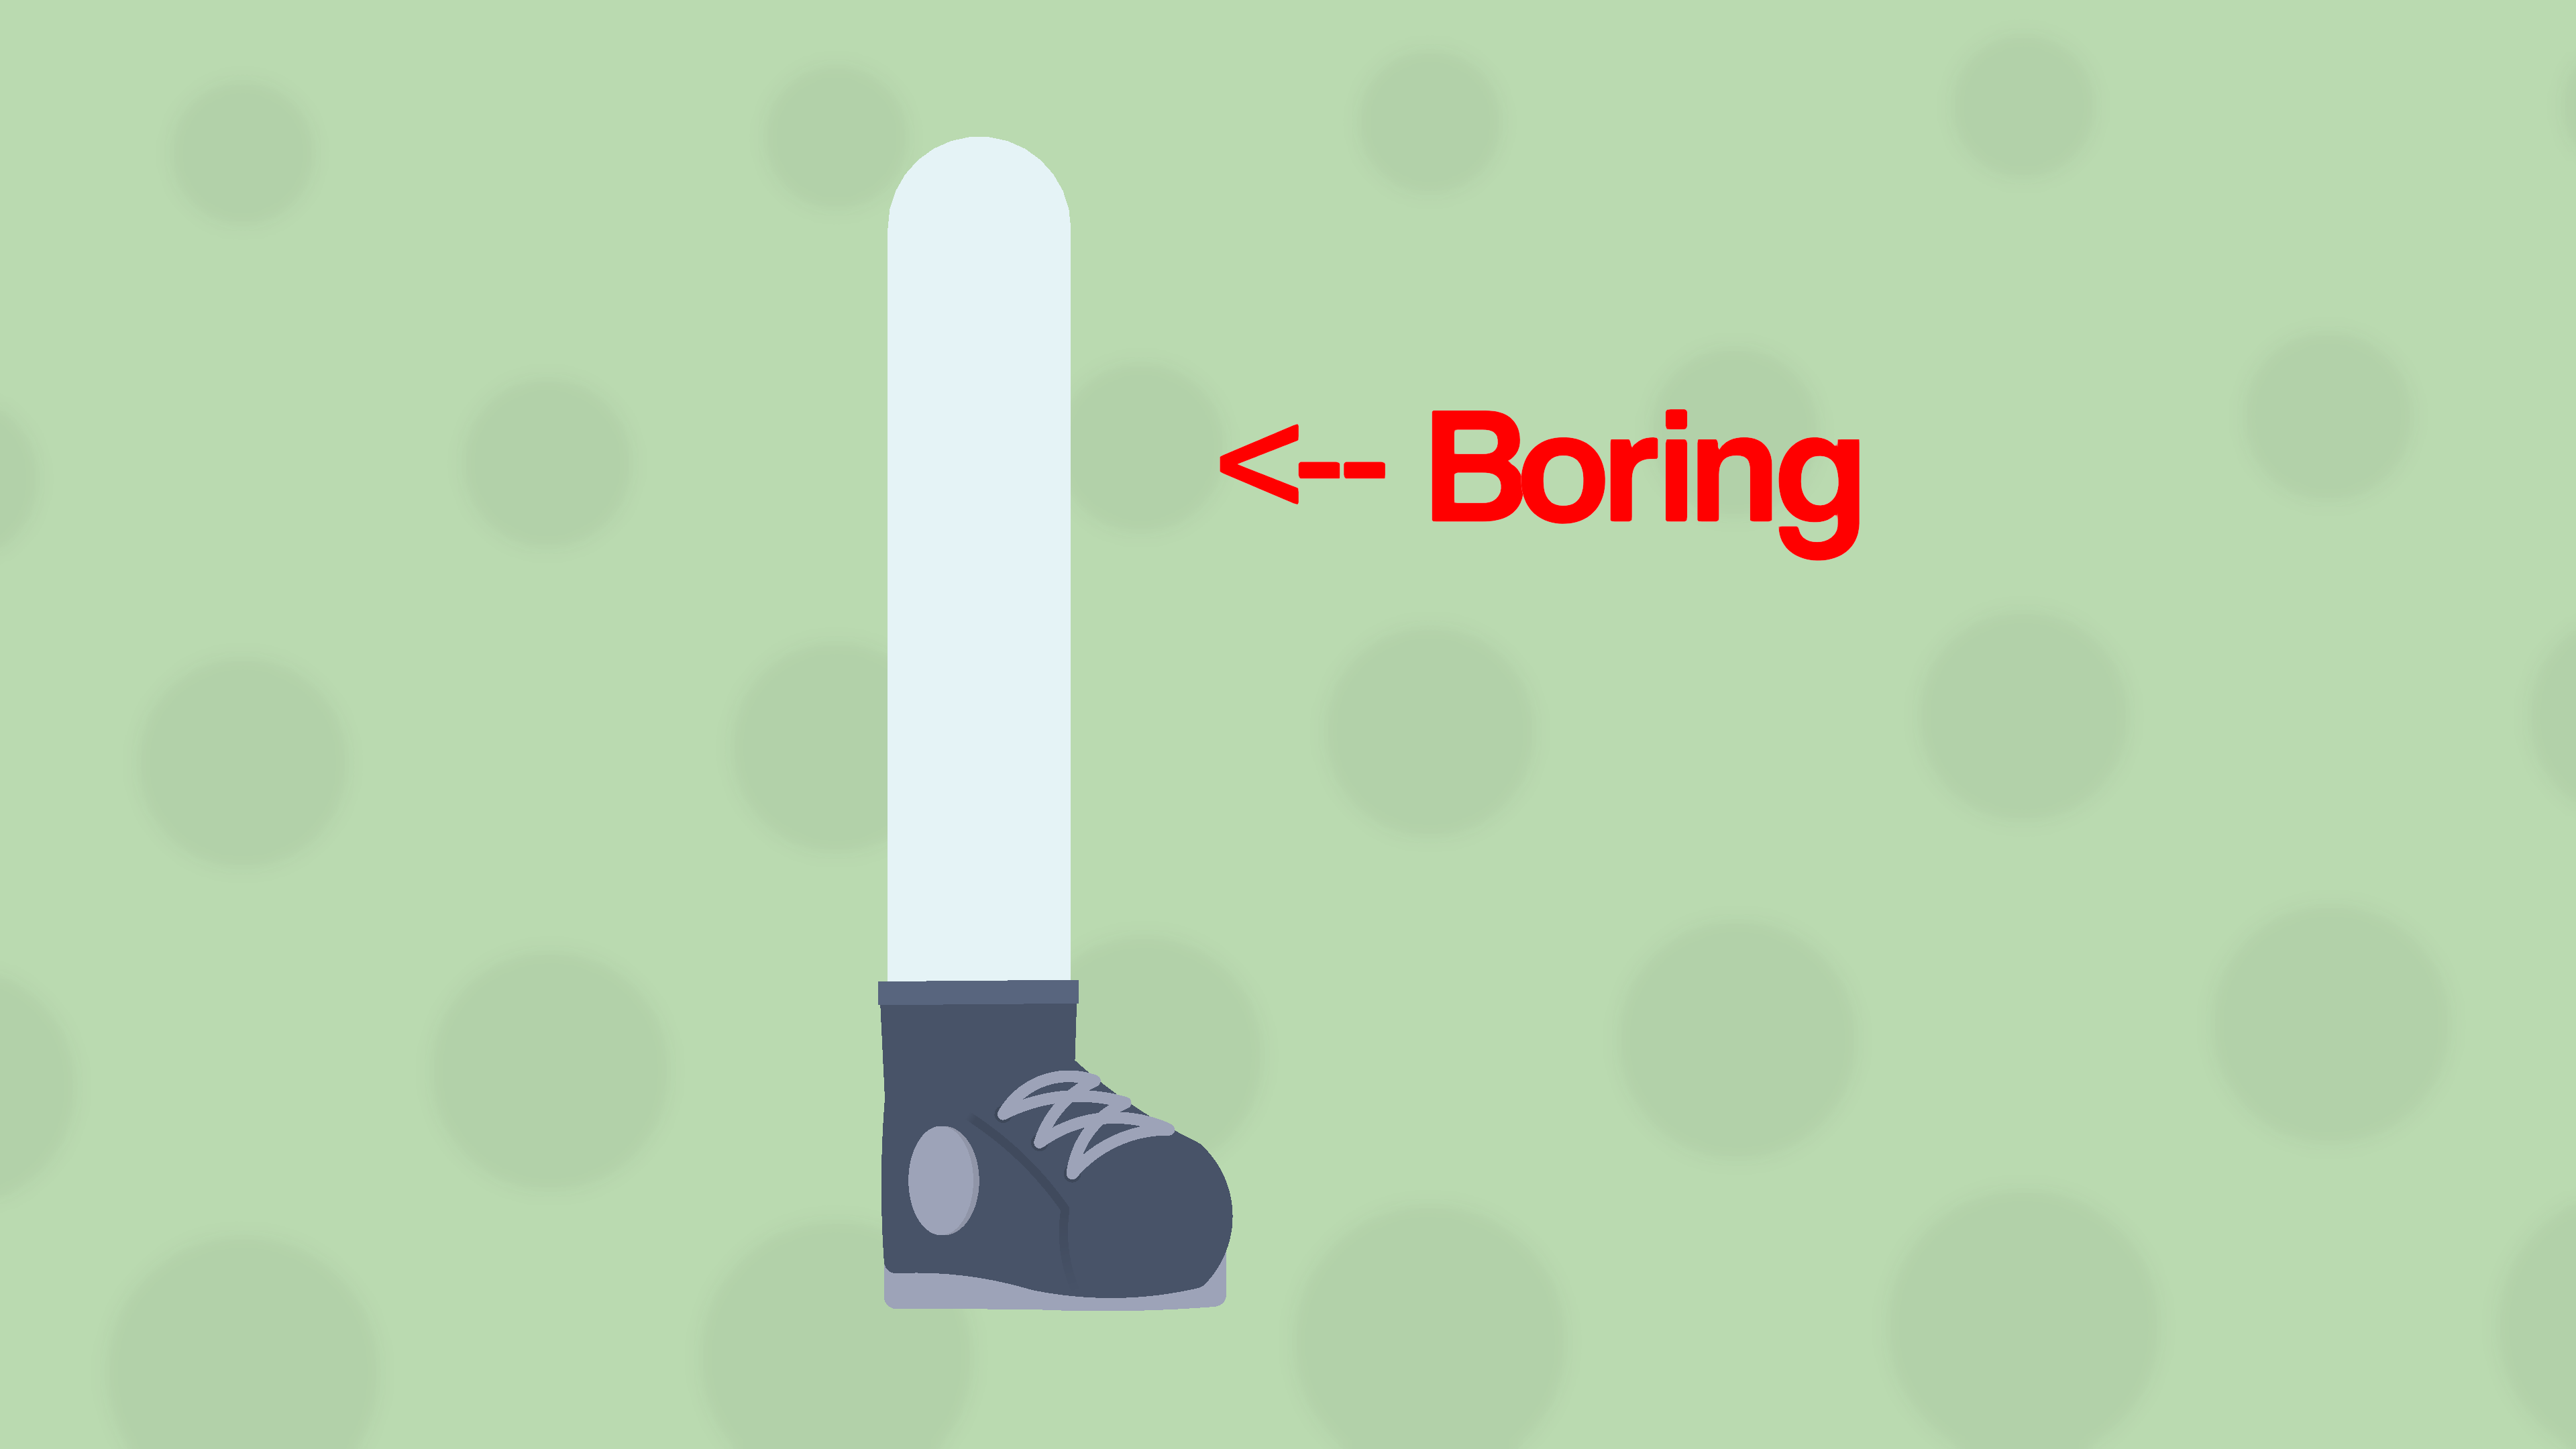
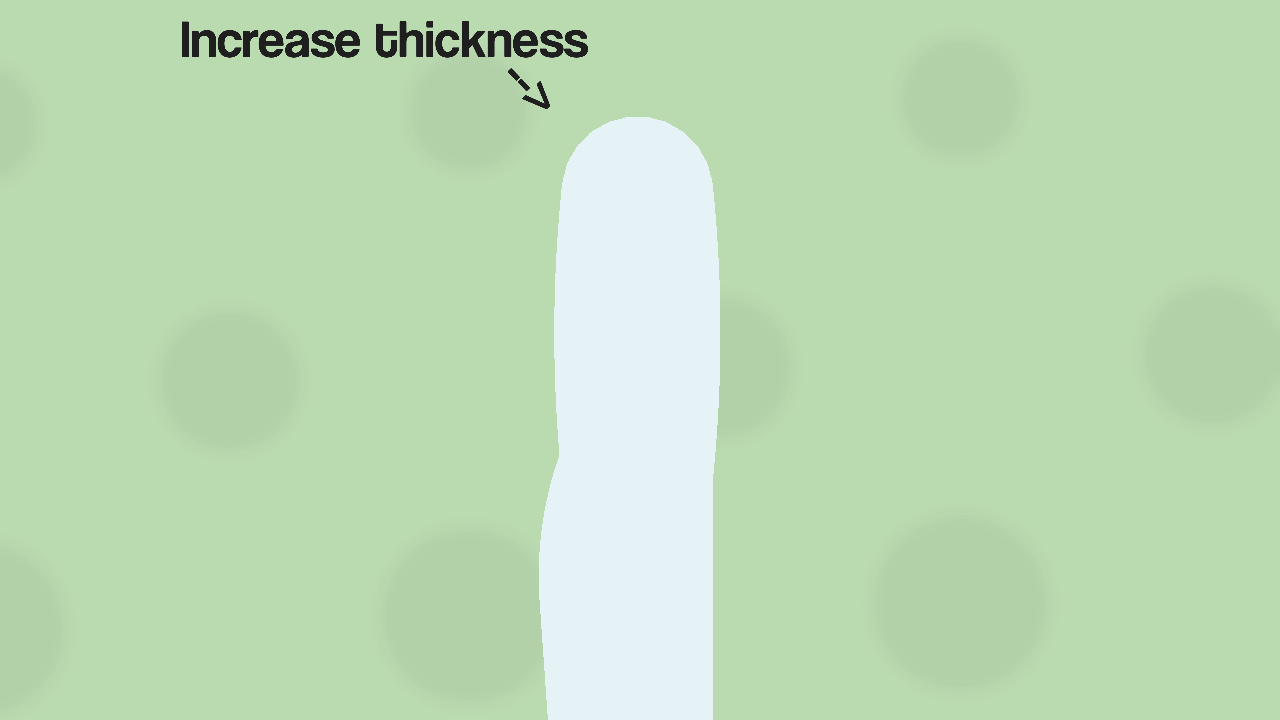
Does your leg look like this? This bland, boring, two-segmented limb? Well, I’m here to help you fix that, I’ll show you how you can add some detail to your figure’s legs and make them look more appealing with 3 (or so) easy steps.
ㅤ
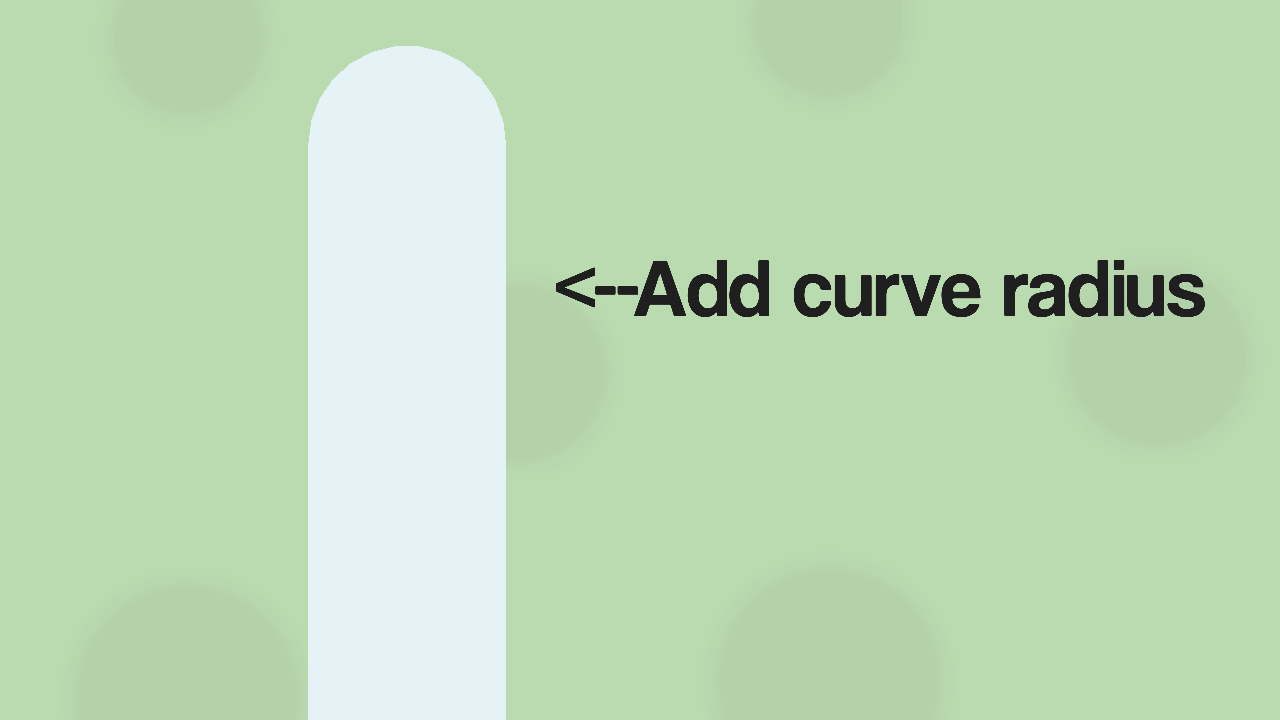
Step 1: Thigh
To save nodes, instead of adding a whole other node to create the front of the thigh, take the top leg segment and add some curve radius. (About 2 to 3 curve radius)Then add a rounded segment from the end of the first node connecting back to the main node (very top node). Finally, add the same amount of curve radius you added to the previous node. You should now have a simple thigh.
ㅤ
Step 2: Calf
For the next step, add a node to the bottom node pointing up and outward from the leg, with some space left over for another segment to connect back to the leg.After that, add another segment to the outward-pointing node and connect it back to the middle node. Finally, add some curve radius (about 2 or 3) to have the calf be rounded out instead of being pointy. You should now have created a simple calf.
ㅤ
Step 3: Knee (Optional but recommended)
To give the effect of the leg having a knee, simply increase the thickness of the top part of the leg by 2 or 3 thicknesses bigger, enough to have a discernible difference from the bottom part of the leg.
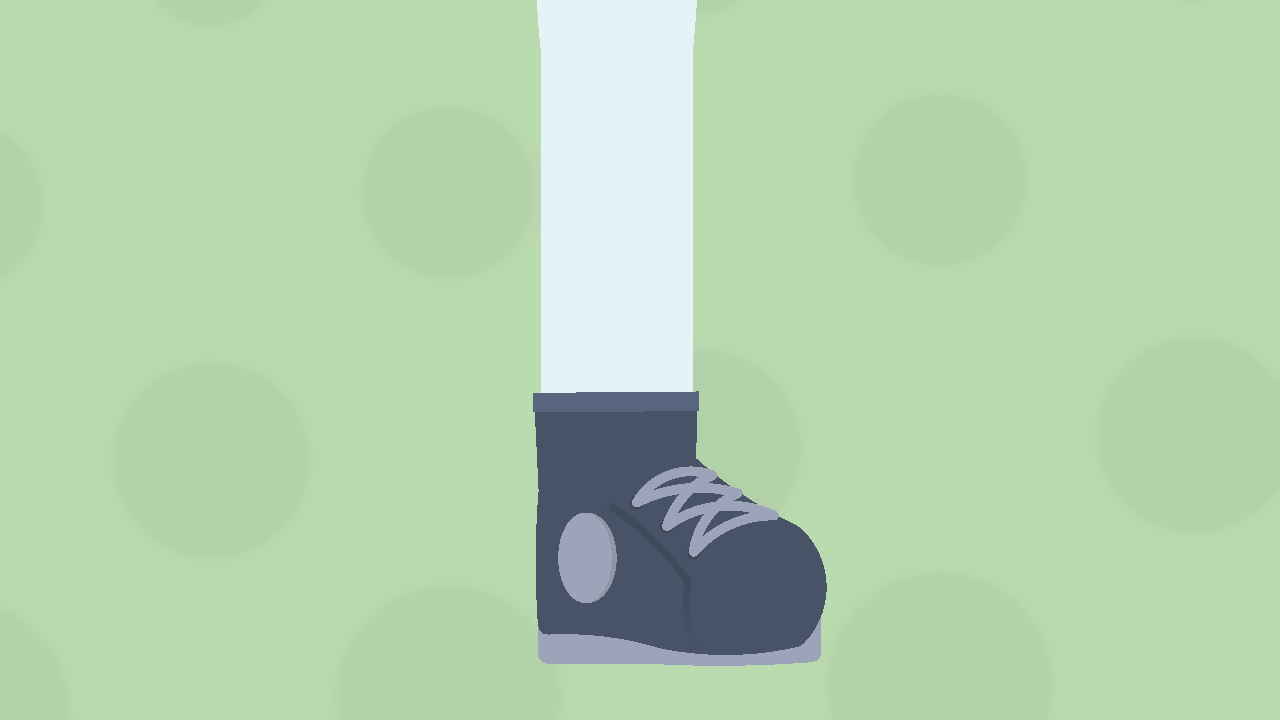
ㅤAnd with that, you have now created a simple, but better-looking leg, with only 3 extra nodes. It should look like the finished product at the beginning of this post, but if it isn’t, I don’t know what to tell you, I explained it in the simplest way possible.
This guide is just a demonstration of how I make my figures, so apologies if it doesn’t fit your style of stickfigures. Anyways, that’s all for now, hopefully, you learned something.
(This Guess Guide wouldn’t have been possible without curved nodes.)
Stick Nodes®
A stickfigure animation app created for mobile devices!
Create your own stickman animations on your Android or iOS device!


Me waiting for hair guess guide

Seriously, amazing tutorial.
I will do that later on when I can actually figure out how to explain it jhbibnfwoj
Alright. ahh, yes… I often dabble in jhbibnfwoj
Excellent tutorial. Extremely informative and useful!
Nios legs