The Guess Guide
Welcome to The Guess Guide
I, Infiniteguess, am here to hopefully teach you something about animation, stickfigure creation, and basic common knowledge about Stick Nodes.
Basically, this group is just a way to share informative tips on stuff and maybe help you learn something new, I might even make a few guides relating to the website.
I will no longer be taking suggestions from a pinned post because I never really did anything with that, so you can just suggest something in a comment under a previous guide.
Guides
Here are all the current Guess Guides in hyperlinks, incase you don’t feel like scrolling or if you’re looking for a certain guide. (These will be automatically updated as new Guess Guides are posted)
Modern Guides
Clothing Details
Thumbnail Submissions
Stickfigure Submissions
Leg Details V2
Sleeves V2
Old/Outdated Guides
Leg Details
Arm Details
Sleeves [Part 1]
Sleeves [Part 2]
Punches
Kicks
Falling Animations
Boots
-

John joined the group
 The Guess Guide 3 weeks, 1 day ago
 -

Sandwich joined the group
The Guess Guide 1 year, 7 months ago -

PartyTrap joined the group
The Guess Guide 3 years, 3 months ago -

MannyAnims joined the group
The Guess Guide 3 years, 4 months ago-
This place seems helpful
-
-
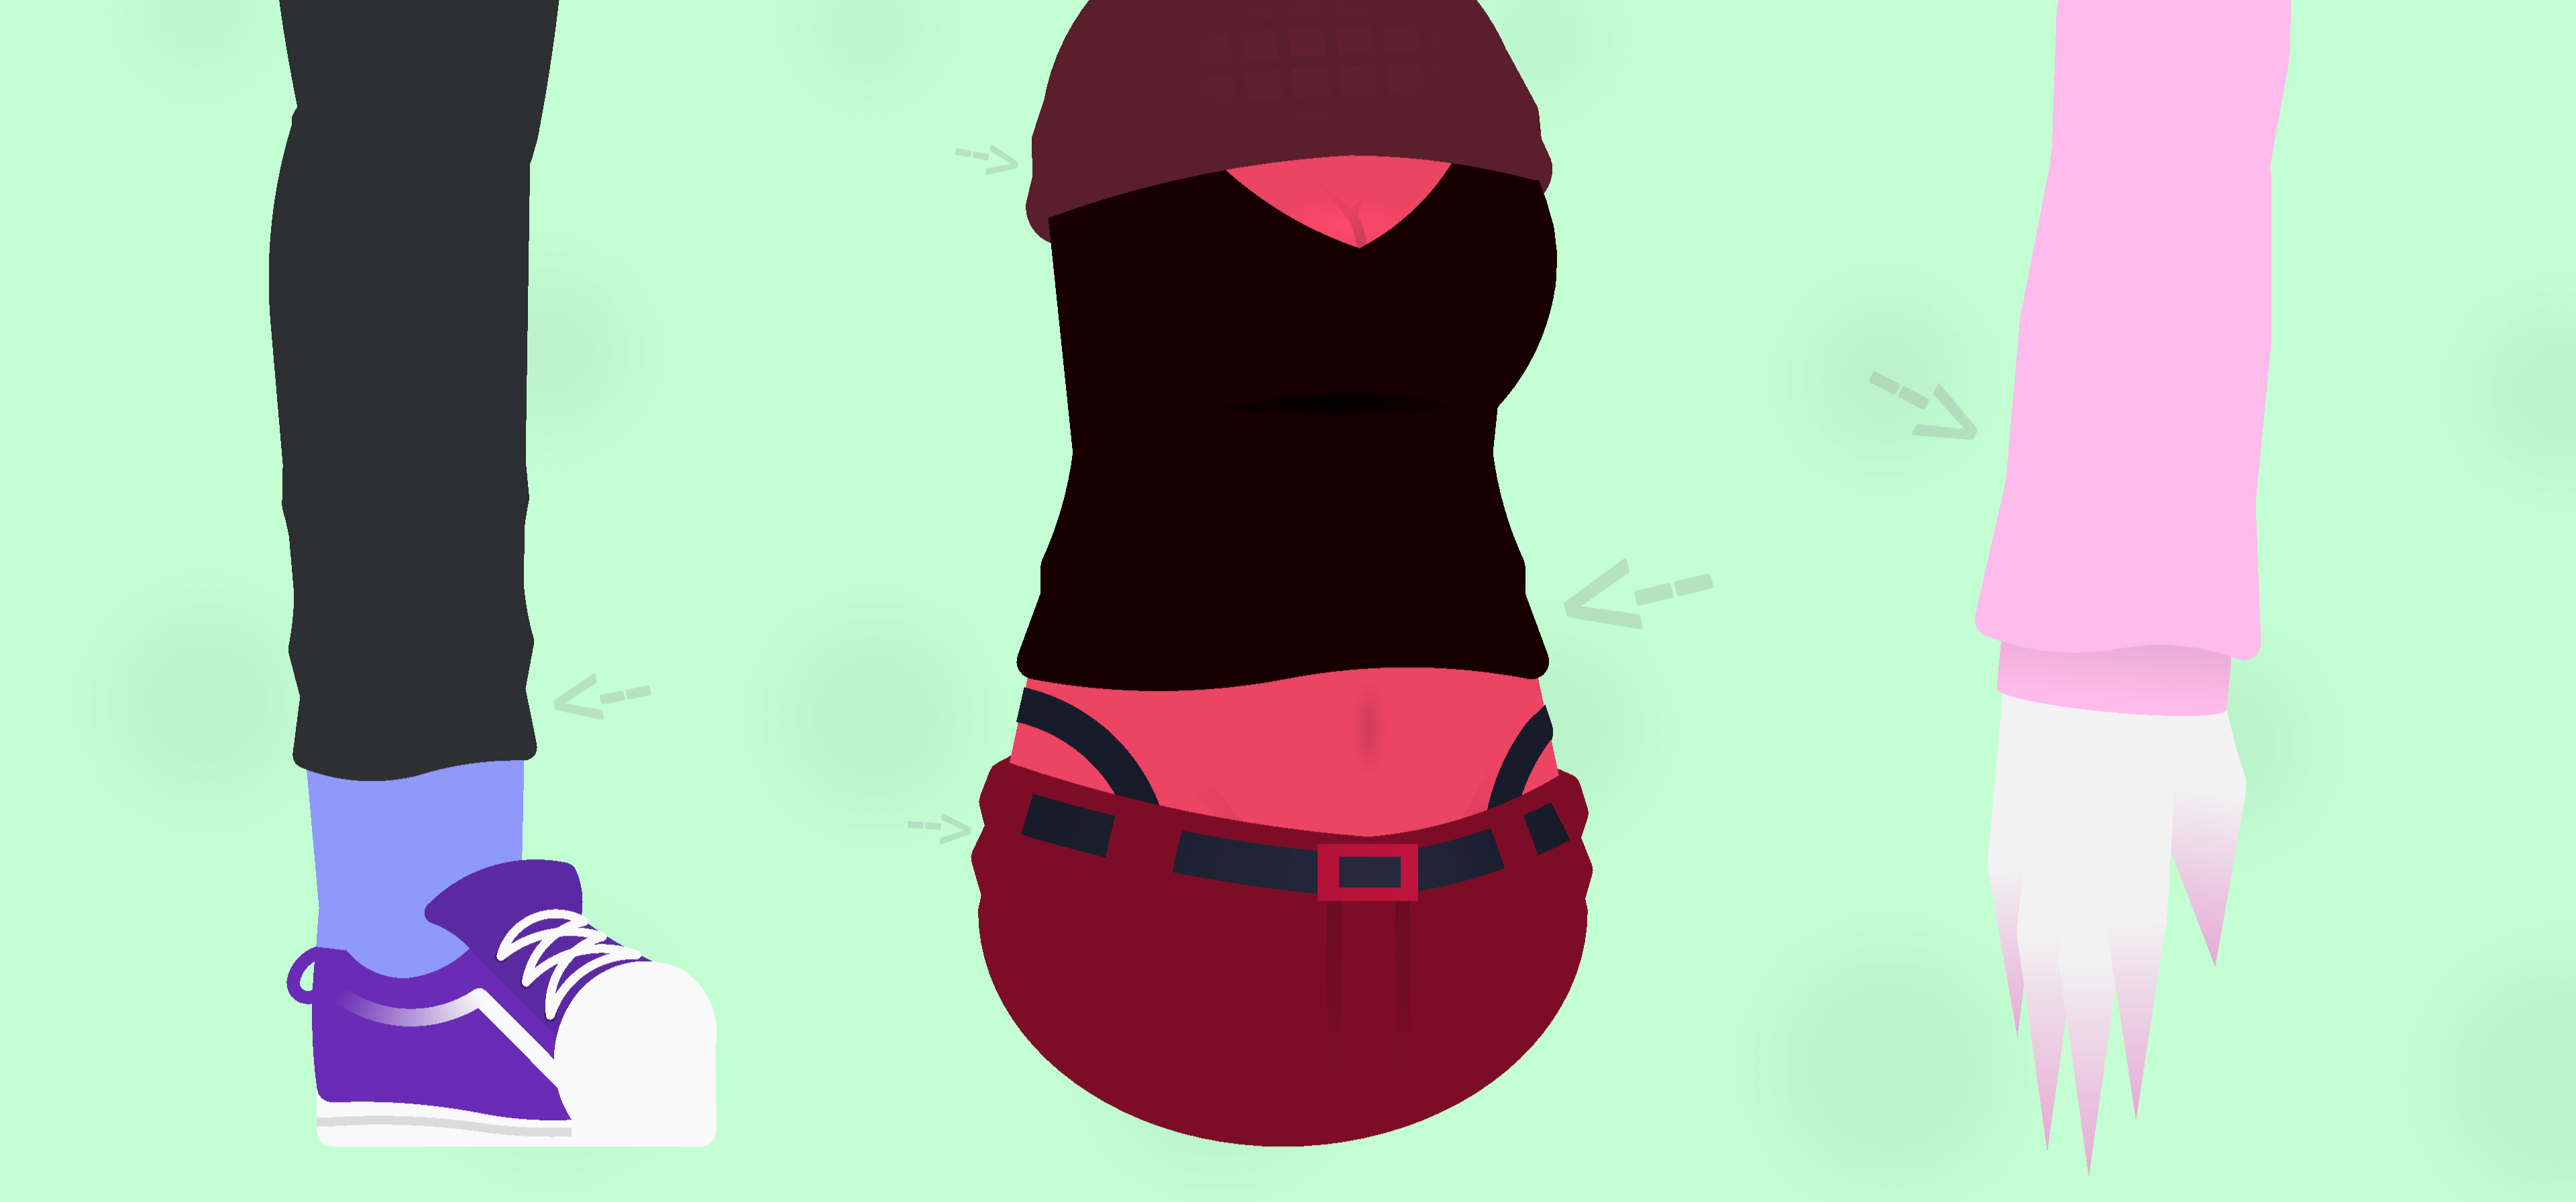
Guess Guide: Clothing DetailsI found another topic to write about, so here’s something I’d like to share about my process when making clothes look less bring or whatever.

ㅤ
Do your sleeves, or any clothing in general, just look flat and mundane? Well, I have a quick and easy solution that I use to make clothes have some texture and shape.Step 1:

ㅤ
Firstly, start by shortening the forearm part of the sleeve, to leave some space for the hand. Next, increase the width of the whole sleeve, so it doesn’t look tight or part of the arm. Even with the first step, it already looks better than before.Step 2:

ㅤ
Secondly, add small segments poking out from the bottom sleeve node. Then have some the nodes zig-zag back into the top node of the arm segment, to simulate creases in the clothing. Once you’ve done that, copy and paste the segment and children to the opposite side, if it wasnt obvious from the GIF. If you want you can also add some segments coming out from the top part of the arm/sleeve.Also, it’s optional, but one thing I like to do is curve the two nodes sticking out by 1, to make it look less flat at the bottom.
Examples:
ㅤ
That’s basically all you need to do in order to make your sleeve look less flat and more textured, doesn’t matter how you do it, just helps make the clothing look more like it’s being worn rather than being placed over. It works not just on sleeves, but on pants, shirts, any clothing really, unless of course it’s like, not made out of fabric or something.Anyways, that’s pretty much how I make the clothing details on my figures, not much but thought I’d share it anyways, maybe this helps somebody idk, that’s all for now, see ya.
-

I just figured out a similar technique to this recently
yay, I can say i’m original2023-02-12 17:01:29 UTC -

ill do this minus the wrinkles
i like my simple clothing :3
good tutorial though very useful2023-02-12 17:17:54 UTC -

Other things to note is to just study clothing through reference images and looking around and at other people irl, see how or what realistic folds look like and looking for patterns from there to make it not just a jumbled mess of random patches of nodes sticking out.
A good example is the long sleeve you showed here, you can definitely make use of bigger shapes and whatnot to add small but noticeable improvements, id show examples but im rusty and like a boomer, dont know how the hell this site works…Another is adding things like lighting and shadows to creases and such to make it less bland and flat, the colors you use is also integral to making it look as lively and neat as possible. Great beginner guide regardless id say
Now wait till people call me out for these blatant lies-2023-02-12 17:38:25 UTC-
 Replying to:
and looking around and at other people irl,
You might be the greatest being within all of existence, master
But SN users are total loners2023-02-12 18:13:06 UTC
-

Cool.
2023-02-12 18:14:51 UTC -
This is helpful!
2023-02-12 18:33:17 UTC
-
Guess Guide: Thumbnail Submissions
I got bored of the “lesson numbers” so I’m just gonna remove it, anyways, today I’ll be showing you how to submit thumbnails for stickfigure submissions if you don’t already know how to. It’s a pretty simple process, but why not explain it anyways, it never hurts to make a guide on something, even if it may be easy to do. Ok this paragraph is long enough just read the guide-
ㅤStep 1: Post-Stickfigure-Submission Process
ㅤ
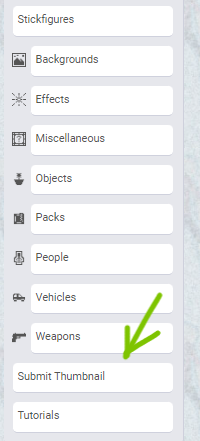
After submitting your figure, log in to the site and click on the “Submit Thumbnail” button on the left side of the screen.You need to be quick so that the thumbnail submission is close to the stickfigure submission, so they can be easily located when it is time for the submission to be uploaded. I recommend making the thumbnail before submitting the figure so that you can easily submit it right after submitting the figure.
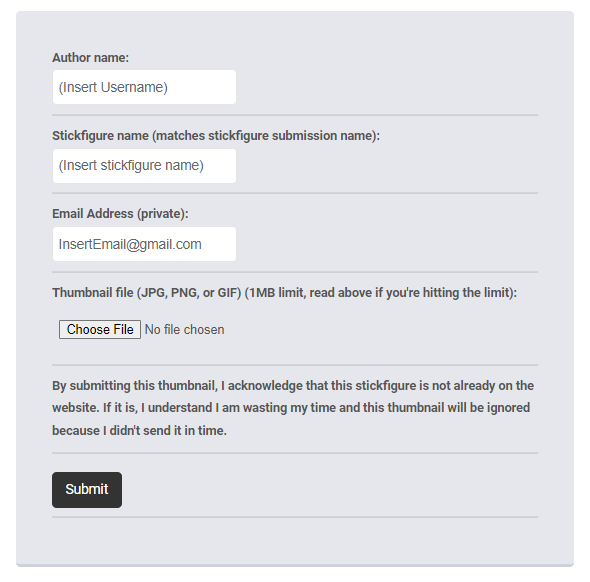
Step 2: How to submit a thumbnail
ㅤ
Once you’ve clicked the “Submit Thumbnail” button, you’ll come to a page with some spaces to fill out, just fill them in accordingly and attach your thumbnail, which should be less than 1 Megabyte because apparently sticknodes can’t handle an image with more than 14 pixels, after that just press submit and the image will be sent to the sticknodes email.Then you should have successfully submitted the thumbnail, if it didn’t work, you probably did something wrong like enter a different email or using an image that isn’t 1 MB or lower, which you can resize with a tool linked on the page. Anyways, that’s all you really need to do, not entirely difficult but this guide is just a JIC (Just in case).
-

fun fact
you can really just attach an image to your submission email
half the people do that and it works fine as well as long as the gif (if its a gif) isn’t over 1mb
2022-11-19 00:12:57 UTC-
Replying to:
ps nice guide
2022-11-19 00:13:02 UTC
-

Actually helpful because I had no idea how to actually do this 💀
2022-11-19 00:31:59 UTC
-
Lesson 10: Stickfigure SubmissionsThis is a question that gets asked a lot, so why not make an official guide on how to submit a stickfigure? Anyways, here’s a simple explanation of how to submit a figure in a step-by-step process.
ㅤ
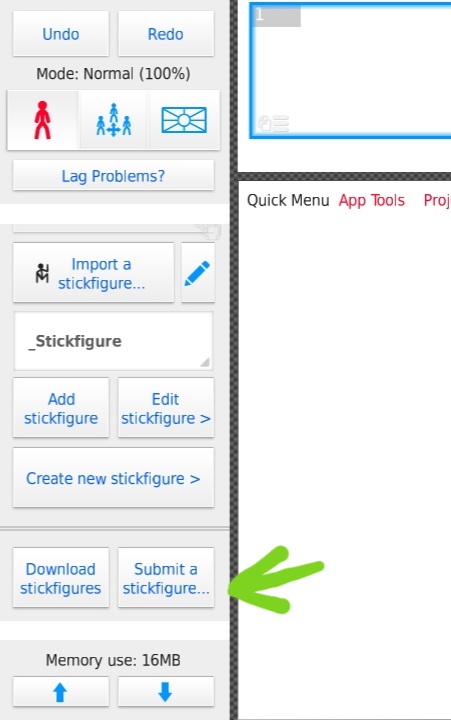
Step 1:
Go to the stickfigure library table, there should be a button that says “Submit Stickfigure”, click it and a box should pop up asking what you want to submit, as of now movieclip submissions aren’t a thing yet, so you should be submitting a stickfigure.
ㅤ
Step 2:
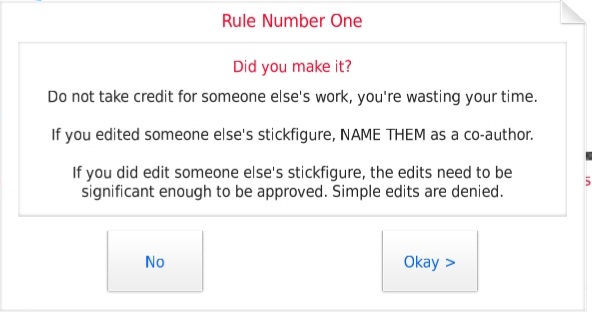
Once you have selected which type of file you are going to submit, three rules will appear. Actually read and follow these rules and if you want your figure to appear on the site.[Rule 1] If you reupload someone else’s figure under your name, it will not be accepted. (On the occasion that the person who accepts the figures doesn’t know that it’s stolen) Also if you edit someone else’s figure (actual changes, not simple recolors and whatnot) make sure to credit the original author of the figure, preferably in the username section or description.
[Rule 2] Submit figures that are appealing and useable. Stickfigures should have non-static nodes only for parts that should be moveable, so make sure to make undesired nodes static. Also, stickfigures should be comprehensible enough to use, so don’t make a mess of segments and call it a day.
[Rule 3] Make sure to properly size your figures, so that everyone else doesn’t have to resize it just to use.
ㅤ
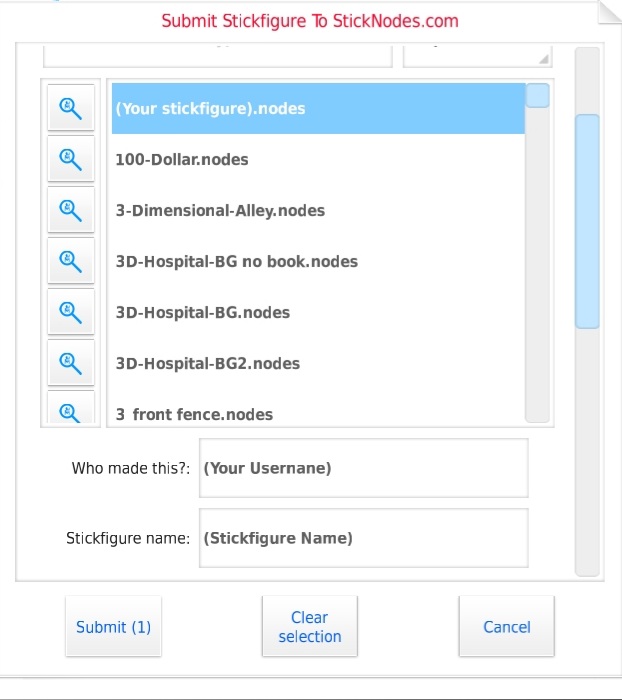
Step 3:
Once you have followed all the rules, a page will pop up for you to select what you would like to upload. Choose the stickfigure you wish to submit, next fill out the required boxes, those being your username, and the name of the figure/submission.
ㅤ
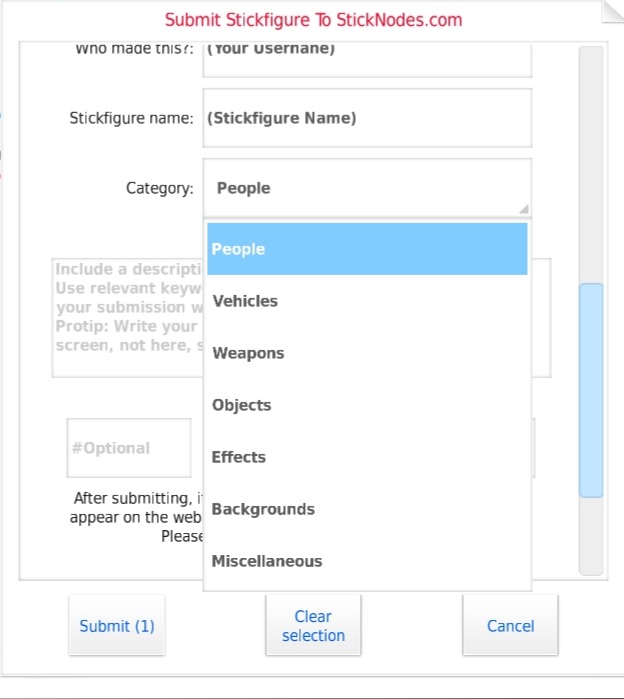
Step 4:
If your submission isn’t a pack (submission with more than one figure), select which category the figure should belong in, those being People, Vehicles, Weapons, Objects, Effects, Backgrounds, or Miscellaneous.
ㅤ
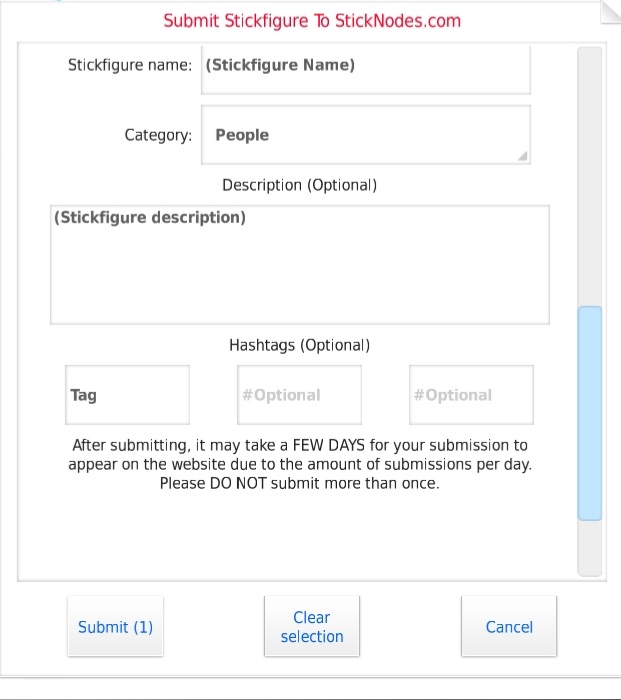
Step 5:
Lastly, add a description to the figure. You can also add a hashtag or two if you want to, but once you’ve done everything mentioned above, click submit and choose to send the submission through email or Gmail. The email you should be sending the submission to is [email protected]. IF YOU DON’T WANT IT TO END UP ON A DIFFERENT ACCOUNT, SEND IT THROUGH THE SAME EMAIL YOU USE TO LOG ON TO THE SITE.After you’ve finished submitting the figure, wait for it to be submitted (It isn’t automatically uploaded, you have to wait a maximum of 2 weeks or so. If it isn’t uploaded by then, it got rejected or was missed. If you are positive your submission was good enough to be accepted, @ ralph and whine about how it isn’t up yet)
But that is all you need to do to submit a stickfigure, the format was a little different but hopefully, this helped in some way. I might also do a guide on how to submit thumbnails apart from this one, so look out for that. Anyways, that’s all for now, see ya next guide.
-

So Guess
How do you submit a figure?
2022-07-28 18:31:15 UTC-
 Replying to:2022-07-28 18:33:36 UTC
-
Replying to:
😮
2022-07-28 19:11:50 UTC
-
Oh wow, this is an actual tutorial.
I thought it was going to be very, very sarcastic.
10/10, very informative.2022-07-28 18:32:16 UTC -

I have a track record of breaking Rule 3 of Step 2
2022-07-28 18:46:22 UTC-
Replying to:
Oh hey cuss
2022-07-28 18:51:00 UTC-
Replying to:
Hola
2022-07-28 18:51:24 UTC
-

Here’s a fun fact for those who didn’t click “Oldest First” on my profile…
I already learnt how to submit a stickfigure and I made some before I OFFICIALLY joined this site lol
2022-07-28 18:49:13 UTC -
When hair guess guide #1
2022-07-28 19:12:39 UTC-
Replying to:
Hey that was my thing-
When hair guess guide #22022-07-28 19:18:07 UTC-
 Replying to:
When hair guess guide número tres
2022-07-28 19:47:43 UTC-
Replying to:
When hair guess guide shi (4 in japanese)
2023-02-12 17:23:49 UTC-
Replying to:
When hair guess guide fünf (5 in german)
2023-02-12 17:59:30 UTC
-

Mellow joined the group
The Guess Guide 3 years, 11 months ago -
ㅤ
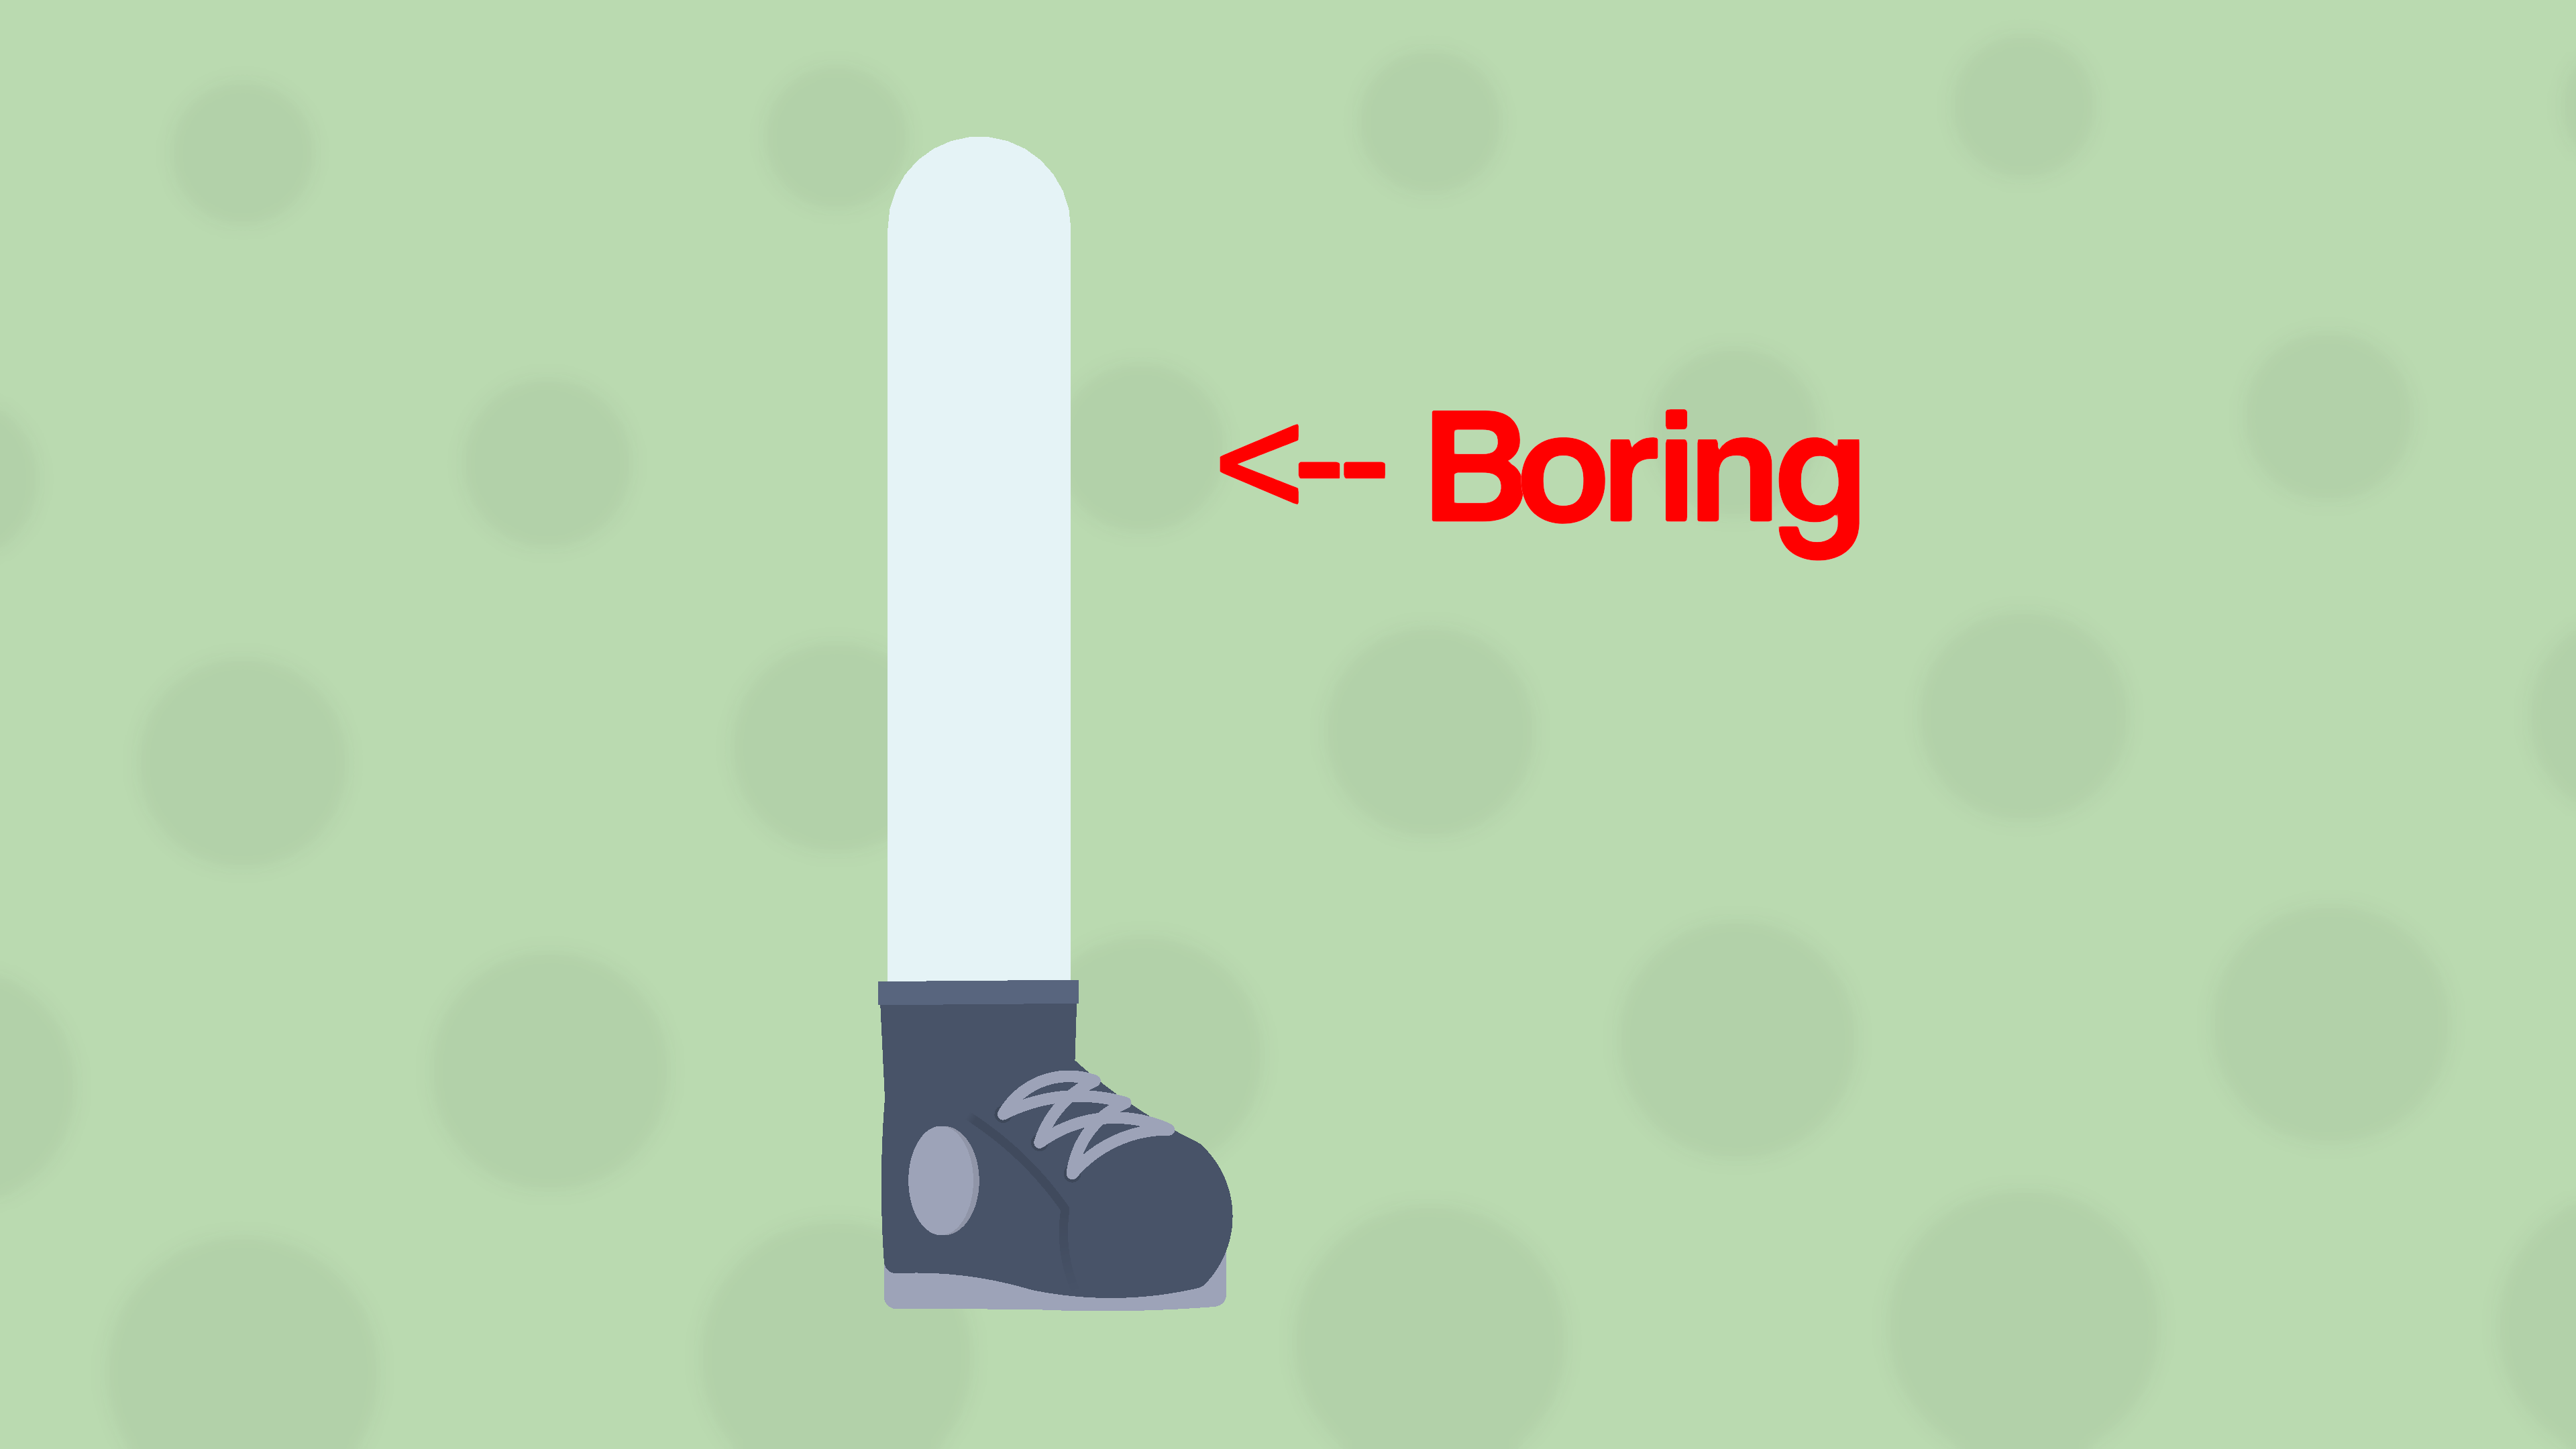
Hello again, it has been another 4 months since I’ve done one of these, but now I’m going to start fresh, this is not scheduled, so don’t expect me to make one every week or so, I’ll make it when I feel like it, or if there’s a high demand for a specific guide.Anyways, I’m going to be redoing the first guide I made, Leg details. I will be using one of my figures as an example and will explain the process step-by-step.
ㅤ
Does your leg look like this? This bland, boring, two-segmented limb? Well, I’m here to help you fix that, I’ll show you how you can add some detail to your figure’s legs and make them look more appealing with 3 (or so) easy steps.
ㅤ
Step 1: Thigh
To save nodes, instead of adding a whole other node to create the front of the thigh, take the top leg segment and add some curve radius. (About 2 to 3 curve radius)Then add a rounded segment from the end of the first node connecting back to the main node (very top node). Finally, add the same amount of curve radius you added to the previous node. You should now have a simple thigh.

ㅤ
Step 2: Calf
For the next step, add a node to the bottom node pointing up and outward from the leg, with some space left over for another segment to connect back to the leg.After that, add another segment to the outward-pointing node and connect it back to the middle node. Finally, add some curve radius (about 2 or 3) to have the calf be rounded out instead of being pointy. You should now have created a simple calf.
ㅤ
Step 3: Knee (Optional but recommended)
To give the effect of the leg having a knee, simply increase the thickness of the top part of the leg by 2 or 3 thicknesses bigger, enough to have a discernible difference from the bottom part of the leg.
ㅤAnd with that, you have now created a simple, but better-looking leg, with only 3 extra nodes. It should look like the finished product at the beginning of this post, but if it isn’t, I don’t know what to tell you, I explained it in the simplest way possible.
This guide is just a demonstration of how I make my figures, so apologies if it doesn’t fit your style of stickfigures. Anyways, that’s all for now, hopefully, you learned something.
(This Guess Guide wouldn’t have been possible without curved nodes.)
-
Me waiting for hair guess guide

Seriously, amazing tutorial.2022-07-19 18:10:28 UTC-
Replying to:
I will do that later on when I can actually figure out how to explain it jhbibnfwoj
2022-07-19 18:14:28 UTC-
Replying to:
Alright. ahh, yes… I often dabble in jhbibnfwoj
2022-07-19 18:18:26 UTC
-

Excellent tutorial. Extremely informative and useful!
2022-07-19 18:42:34 UTC -
Nios legs
2022-07-19 18:49:02 UTC
-
Ok so, I feel ready enough to make more guess guides, like the one I made a couple months ago was fun to do, so I might revive this group again.
Only thing is I dunno if people really need help or not, since everyone is better than me j3hirgibnj. The first few guides are kinda ehhh, and I wanna make more now that I have improved too.
Like the boot one for example sucks balls, my shoes look a lot better now so I could probably redo that one.
Anyways that is all, I may or may not continue doing these, depending on how it turns out.
-
I think if you do continue it you should do one on hair.
2022-07-18 20:18:56 UTC -
since everyone is better than me
…
2022-07-18 21:51:29 UTC -

Yea please continue I liked them
2022-07-19 18:09:49 UTC
-

Geekleas (Linkleas + Geekster1984) joined the group
The Guess Guide 3 years, 11 months ago -

Dimzzanims joined the group
The Guess Guide 4 years, 2 months ago -

Master Strike joined the group
The Guess Guide 4 years, 3 months ago -

ㅤ
Hi, it’s been about 4 months since I last did one of these. Anyways I tried experimenting with other formats, and I chose this one to try out, anyways let’s start the guide.Today, I’ll be using one of my own figures as an example for the lesson, which I will break down step by step and hopefully teach you something.

ㅤ
Step 1:
Create your arm, 2 or 3 segments are fine, I’ll be using 2, the upper arm and lower arm. Now that you’ve done that, you want to make the thickness of the upper arm a little bigger than the lower arm, about 2 thicknesses wider, and change it to the desired color for your sleeve.
ㅤ

ㅤ
Step 2:
Next, to add some texture to the sleeve, add slightly angled segments poking out from the upper arm segment and some slightly angled segments back in to meet the main node (the one at the top) to close off the texture.Step 3:
Next, add a segment to the lower arm, and then set the thickness to 0, once you do that, add a segment to the invisible one and have it reach all the way up to the upper arm node (the middle one) and add circle or round segment to close it off. Make sure it is also the same color and thickness as the upper arm since it is going to be the bottom part of the sleeve.Step 4:
Add a segment going down be the bottom part of the sleeve, it could be the same color as the sleeve or slightly lighter/darker. You could also add a gradient segment to act as a shadow, but it’s only optional.
ㅤ
Step 5:
Like step 2, add segments sticking out from the node with 0 thickness, but have the tilt a bit farther, then stick back into the sleeve (Make sure that the segments are layered behind the bottom segment).Step 6:
Finally, to add some detail, add creases to pointy parts of the texture segments. The way I make creases are basically just 3 triangle nodes, 2 flat on the sides of the node, and one sticking out. However they don’t all have to be the same or symmetrical.
ㅤ
And that’s all. Hopefully, this wasn’t confusing, just experimenting with how to explain stuff. Anyways, thats how you make better sleeves, I’m not the best when it comes to stickfigure creation, but this is just how I do it.-
Sorry guys, I posted the unfinished one, so I had to delete it.
I thought I was on my test group, but I was on my profile and didn’t realize I had posted it while I was in the middle of working on it.
2022-03-28 19:14:47 UTC-
 Replying to:
I really appreciate you doing this, now i can probably be able to make better clothing for my figures.2022-03-28 20:07:17 UTC
-

TimelostGamer joined the group
The Guess Guide 4 years, 4 months ago - Load More


