@arcionek


Joined on August 18th, 2017, this user has been a member for 3,230 days and is the 1,949th person to register an account.
Has 13 submissions, the first one uploaded on December 14th, 2016 and the most recent on May 31st, 2019.
Of those, 1 has been featured and 6 have won Users' Choice.
On average, each submission earns 5,415 downloads.
In total, they have been download 75,822 times.
Counting every individual stickfigure, including the contents of all packs, this user has technically made and submitted 52 stickfigures.
On average, when this user rates stickfigures, they are 87% positive.
Also, they are typically 78% positive when rating animation spotlights.
Has made 1,049 comments on non-activity pages of the site. Alternatively, this user has made 12,164 comments on actual activity pages of the site.
They have visited the site consecutively for 6 days, their best streak being 125 days. On average, they post 1 update and 5 comments per week.
This member is a Users' Choice voter!
Their current voting streak is 0 and their longest streak is 27 consecutive votes.
 Arc gaming reviewsOwner
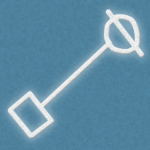 Rigging Nerd ClubOwner
 ????????????????????????????????????????????????????????????????????????????????????????????????????Owner
- Temp group will deleteOwner
 Stickfigure Starter KitOwner
 Stick Nodes Beta TestersOwner
 No girls allowedOwner
 Sticknodes ModdersOwner
 Mod Talkadmin
 #TeamArcionekadmin
 Admin Talkadmin


-

-
-
Replying to comment by:
Nah I’m pretty sure you said a lot anyway lol. That trapezoid thing is really interesting, though dunno what you meant with circles
-
Replying to comment by:
There’s thankfully backup shits in the recent update so you don’t need to worry as much about losing progress lol.
-
Replying to comment by:
Knew I’d mess up one ping. @clarenceycong
-
A bit of a hefty ping incoming, sry.
@gyro @jack @crazyanims @cyanims @pondiepie @explosivebullet @scouttrooperanims @k-zilla @teamwestHey, I’ve thinking about node creating and the different ways people approach making them. If y’all could anwser these two questions it would be great.
1) Are there any things you do before going to creation menu? Like sketching out the figure on paper or anything like that. Pics are also welcome.
2) What are your common habits and tricks/cheats when creating sticks?Also for anyone else reading this post, feel free to anwser these questions too. The more info on this page the better lol. I’ve just been naming bunch of people from top of my head.
-
Replying to comment by:
Steve
-
Replying to comment by:
I’ve been brutalising Ralph with better UI idea shit since 2018 or so. Lmao.
-
Replying to comment by:
Just killer queen but kangaroo.
-
Replying to comment by:
They have multiple uses.
You put them next to a container, it outputs signal strength depending on the amount of items in it.
But also it can act like an “if” statement, where the power from the bottom gets compared to the side, if it’s equal or higher, the signal goes through.
And lastly there’s different subtraction mode, where it takes the main power, and subtracts it by the power from the side.
-
Replying to comment by:
That shit was added back in January 3rd 2013
Mainly cuz it was the missing component for many contraptions.
Especially super computers for some reason because people used it for storing numerical data. But that shit was done in ancient Minecraft times still.
-
I’ve ascended. Acquired intelligence only the greatest sages could achieve. My power is now unmatched and unlimited.
I found out how to use Comparators in Minecraft.
-

Intelligence unmatched
2022-07-03 23:00:22 UTC -

A redstone comparator is a redstone component used to maintain, compare, or subtract signal strength, or to measure certain block states (primarily the fullness of containers).
what the frick even is minecraft anymore
2022-07-04 00:02:47 UTC-
Replying to:
That shit was added back in January 3rd 2013
Mainly cuz it was the missing component for many contraptions.
Especially super computers for some reason because people used it for storing numerical data. But that shit was done in ancient Minecraft times still.
2022-07-04 03:30:53 UTC-
Replying to:
Especially super computers
I repeat…
-
 Replying to:
I still dont understand how they work
2022-07-04 06:39:54 UTC-
Replying to:
They have multiple uses.
You put them next to a container, it outputs signal strength depending on the amount of items in it.
But also it can act like an “if” statement, where the power from the bottom gets compared to the side, if it’s equal or higher, the signal goes through.
And lastly there’s different subtraction mode, where it takes the main power, and subtracts it by the power from the side.
2022-07-04 08:00:15 UTC
-
Replying to comment by:
Dude hasn’t even developed his eyes but still takes aim
-
Replying to comment by:
https://mobile.twitter.com/arakiart/status/1254477846866726913
-
Replying to comment by:
Ironically on my birthday post and nothing else that I put effort into lmao
- Load More

Knew I’d mess up one ping. @clarenceycong
Oh right might also mention @aguy
1. I always bring up a reference photo before starting on the figure. Reference photos are a good way to know what you’re making (For example a Gun), or take inspiration from (For example, basing off a character from a hedgehog, so you might pull up sonic).
They are extremely useful with silhouette work as well since it is essentially outline if you’re doing those types of stickfigures.
2. I always create a “wip” stick and continuously save what I’m working on under that stick so I don’t lose progress if I need to get off, if the app crashes, or if I have to tab out of the app for a second.
For silhouette stickfigures I always pull up a reference photo of what I am making and basically outline it, then fill it up with poly fills. I used this method a lot and it helps alot. This makes the stick node-hefty though if there is a lot of nodes in the polyfills. One thing i do not like about polyfills is that it adds another node to your count each time you connect it to another node.
There’s thankfully backup shits in the recent update so you don’t need to worry as much about losing progress lol.
Yeah it is pretty useful though I usually keep to my method since it’s essentially on a timer. If you tab off of the app before it periodically backups your stickfigure you can still lose the progress. In my experience, it’s only really useful whenever you are going to be on the app creating stickfigures for a long time. Don’t quote me on this but doesn’t it back up every 5 or 10 minutes?
Yeah I think so. @ralph what’s the timing on that shits and why is there no way to customize it lmao
Me being put among these guys makes me feel like I’m actually good-
When it comes to me creating characters specifically, I usually resort to something 3rd party in order to make my “first draft” of the design. One I use primarily is heroforge.com, but I try not to limit myself with it past that first draft. I usually build on that design when I get to making the figure, so it comes out even a little bit differently from the initial concept. On other occasions, I make an inspiration board filled with objects, characters, items, colours, etc, and I use that to put my ideas to form. Those work well as references for when I make the figure as well, as I can grab ideas from it on the fly.
Tricks and techniques that I use? That’s a tricky one. I use lots of trapezoids, you’ll find them everywhere on my figures. Putting a circle between a trapezoid and another node easily fixes the issue of there being an empty space. I try to make sure that most if not all of the non-static nodes are able to be smart-stretched. I don’t animate as much as I used to, but this helps for stuff like squash and stretch and exaggeration. I can’t really think of any tips and tricks, and I know I have a ton, but I don’t really know what the question is asking for. Sorry lol
Nah I’m pretty sure you said a lot anyway lol. That trapezoid thing is really interesting, though dunno what you meant with circles
I’ll make an example
The reason I also @ u was because of how squashy your characters get and the rigs you put behind them lol
Ah, yeah they’re pretty squishy
The structures of most of my figures typically have trapezoids making up most of them, in the arms, legs, torso, stuff like that. That wouldn’t be possible if not for this.

It’s stupidly simple, putting a circle that’s the right size in the middle of the two, but it works effectively.
Oh my god I didn’t even think of it and it has no right to look that good.
I’d be incredibly surprised if I heard that no one knew of this
Are you kidding me- ive been doing that trick before mellow even became a popular user-
just because they weren’t popular at the time, doesn’t mean I didn’t know this shit lmao
What does popularity have to do with this-
Just using your popularity as an example of saying i knew this for a long time now
I didnt mean to be rude at all, hence me using alot of “-“ and trying to sound as unrude as i can
Oh no, I get that, it’s cool
I use this trick quite a lot with my sticks, but when I try trapezoids with larger top ratios with a circle in the middle of them, the circle tends to be either too visible (circle too big) or the trapezoid ends stick out of it (circle too small)
was wondering if you knew any tricks to counter this for the sake of my sanity
It’s not a huuuuge problem, sorta just a pet peeve
Curved segments can help to smooth out “trapezoid joints” as I like to call them
I think I understand
Thanks 🙏
I genuinely don’t know lol, I struggle with this issue too
im so sorry i put off adding rounded corners to trapezoids for so long lmao
Better late than never
1) Yes, often times I do sketch out the designs that I’ll attempt to make.
2) I don’t know if I have any habits/tricks to speak of, but I wish I did.
1. I always make a sketch of the stickfigure before I start, I also use coolors to create my color palette.
2. I usually always start with the head and never touch scale button in case I need it for more e important things, a little cheat I have is with face and arms positioning, the mother node is not usually directly connected to the head or torso, i make a 100 node long invisible node that becomes the mother node of those parts so they move properly like a puppet.
coolers
what
(seriously, what is that)
Coolors is a web page where you can get color palettes based on just one color
Coolers are the thing my uncle Rifo sells
1. I just wing it with a general idea of what i want to make with some references
2. I abuse rounded segments and elipses, and using alot of principles of art since i treat my figures as drawings more than well… figures
Also alot of what jack said trolololol
Now that I’ve recently gotten back into drawing, I have actually been sketching out ideas for original characters, but most of the time I just use a reference image(s) to make most my figures. (I suck at character design)
1: mostly gather reference. If im really struggling to get something like the hair done i try sketching it
2: not sure what you mean by cheats but i do make some mechanisms from time to time like the claws of my wolverine or the torso of my doctor strange
example

i would explain how this works but i dont wanna go out of business
*literally downloads stickfigure and uses edit mode*
you have fallen right into my trap
wait… oh fuck
that was so clever im gonna give you UC vote tmrw
shit like this gets me excited for sn pc and what would be the primitive first steps of nodegramming
Even though i was not pinged and extremely unpopular (also drama with gigan) i am still gonna answer these questions.
1. I mainly gather information about stickfigures i want to make, like for example an employee from the welfare team (guy in blue suit with black vest and badge on right/left arm). However i STRUGGLE at making vests properly. Especially since there are 7 departments (Information. Safety. Training. Central Command 1. Central Command 2. And Welfare) that lack vests..
2. I mainly use the default for reference, so i can make different stuff on stickfigures and make it look better. Like 9 or 13 nodes (i forgor 💀) instead of 2 for arm badges. Especially with stuff like shields that can be paired up with a baton or machete. Or if i ever want to make an abnormality in the future.. ill use a bunch of different nodes and parts. So like Double Triangle Head (ZAYIN)
Or Nothing There (ALEPH)
1: The only thing I do before going into the creation menu is typically if it is a recreation of a gun or basic object, I just make sure I have a perfect reference for the thing I am creating and make sure I have any parts I am building off on in the 1st frame of the animation to reference off using the trace frame feature. A recent thing I am doing is setting out some of my measurement rulers to scale things correctly, in example the bullet a gun fires when building it into a magazine.
If it something more creative and built on my imagination, since I base much of my stuff off real stuff I grab smaller individual references that I put together. I also use my measurement rulers for this too and do no sketching. For my most recent fictional gun, I made a really crude and basic rough draft of the design in SN before I elaborated on the shape and design or even color in a new figure. I also make sure I start creation with some sort of direction for the figure and as I create things I balance out details and design and add things going on a tweak them to make sure everything fits together.
2: My main tricks mainly consist of using to textbox to make sure things are straight where I need them. Mostly I will trace more geometrically complicated objects to give that high quality look more and nail the shape more accurately. (Doing that also is a sacrifice of nodes but I don’t care too much) On my characters I need to make sure they use a ton more for polyfills in joints because of the complex base anyway. I make segments go the direction of smartstretch as much as I can so the function better with smartstretch on figures now. I also always put together stuff before I consider it complete and resize any limbs using the segment resize. Recently I haven’t really needed to do thst though, since everything I have is more polished and functional than before.
how u do the characters do lol
like guns.. sure, you can trace them. But how you make your characters is totally different experience im guessing lmao
As I said, for more creative stuff I get a set of references and take some ideas off them and mash em into a character. For characters with actual faces revealed, I sometimes will use a create a character system in a game to get the facial structure looking right, or I will use some random dudes face on the internet and trace that.
The measurement rulers still come into play for the gear they have on them. Making a character normally consists of clothing, gender and body type decided first, and then I build off that and continue to their gear. Facial features are normally pretty rough until the end of making a characters face. For porting say the Male NBC veteran gear to the Female NBC veteran I copy paste between the figures a lot. Sometimes just trace the other and make it fit with the body of the other.
Explaining some of the creation of the characters and the steps is really complicated, atleast for Bullet since all sorts of inspiration was taken with him along with inspiration from my own stuff.
its weird how far some people go to get their references, be that heroforge or just actual software lol
Heroforge is very versatile. And if you’re skilled enough with it, it can take you quite far in the conception stage of creation
AKA: Me
Ngl at first i thought of heroforge as this sort of “Hey look i made my OC in 3d on this website”, but the fact its turned into an useful art asset is quite something
Yeah, it’s funny how it’s usually the other way around
“Hey look, I made my heroforge OC in SN”
Lmao. I sometimes even toss some stuff into Blender to get a proper reference angle of stuff. Haven’t check heroforge but I always make stuff harder on myself.
Should’ve made also a poll to just have people vote if they sketch out their stick first or not damn. Ralph gotta make this a sidebar poll lol
good idea
give up
I know I wasn’t mentioned here but I see other people talking here too so I’ll put mine too
1. I do not sketch figures out
2. I have my desk, with my desktop, then move the keyboard and place my Chromebook there. I search for reference images on my desktop and/or facts and features I could add to my figures (Say, gun functions) then use my Chromebook to make them. This creates a very helpful system for me of just looking up and down for everything and not having to exit the app on my Chromebook to do anything. It also helps make a list of the figures I’m making since I forget the names of figures most of the time and that’s not good when I’m finished and am stewing at the naming screen. It may not be a very complicated system but I couldn’t really make figures without it
this thread is interesting as hell to see everyone’s different (yet similar) take on how they work
Very much so
1. I think about what I’m going to make. I don’t necessarily plan or sketch anything, I mostly just plan everything in my head and experiment with it.
2. When I’m making figures, I mostly just try to flesh out the illusion of what I’m looking for. If I wanna go hyper-realistic, I use ellipses for shading which works surprisingly well for very intricate detail. When I’m going for my normal style, the point is not to make it look realistic by adding features something realistic would have (i mean intricate detail) but create thr illusion with a few specific methods:
==============
1. 3 dimensional illusion (you could learn this from looking at underbaselevels figures)
2. Elliptical highlights (you can learn this from scout trooper, or infinite guess who now uses it. *usually seen in hair*)
3. Gradient use (you could learn this from jackfly more than anybody, look at how he uses gradient. Also just common sense for where to put it such as shadows. A neat thing I like to do though is to create a 3d effect by having one ellipse. Putting one behind it, make it darker in color and add a black inner gradient)
4. Light source (always take into consideration of the light source from all light-emitting objects.)
5. Add a round line brighter than the object at the side where the light source is. Split segment and add gradient at both ends that connect to each other at the middle. (Gradient is optional, I sometimes use it and sometimes dont)
6. Add an ellipse At the other side that is darker than the rest, and add an even darker gradient at the center.
7. Also add random ellipses similar to the elliptical highlight around the object if necessary.
==================
The finished result is a look like copoctatius.
Its basically a combination of what other users do, put all into one figure to come out with a “realistic” result. If the figure isn’t large, this doesn’t take up that much nodes as it would look to take Imo. Copoctatius is large though and is up to 2000 nodes.
Some examples


You could also study the figures from other users too to harness even more methods, and create figures that look incredibly realistic yet not that node consuming as it looks.
I fucking love how you pointed each detail you mentioned in the pic. When are you gonna make tutorials on YouTube lmfao
seriously, your figures are very, very unique and you have free YT content right there of “watch me build a stickfigure”
just uploaded timelapses of you working with intermittent real-time where you discuss (text/voice) what you’re doing and why/how, so its a bit of a tutorial
1. I don’t sketch my figures before hand. Usually I think up a design in my head and search the internet for references for that design. Hair styles, clothing and the like. In rare cases I look up a color palette, but I usually just eye-ball that stuff.
If the character is from a line of other characters then I line up those figures in the animation window before going into figure creation. Helps give reference for height and proportions since I want the characters to look good together. Creating a line of figures is good for character design too. A “tall” character is only as tall as other characters are short I’d say.
2. My figures are a bit unconventional, but tips from the process for my quarter views are as following.
Everything starts with a half ellipse. This forms the hips, and the rest of the body (including the legs!) are attached to it. Then you can build the torso by offsetting a rounded node. Real easy way to create perspective and an even easier way to make a front view later by centering the rounded segment.
Before I move onto details, I make sure the general shape of the figure looks right from both sides. Flipping your creation before you detail it is a good habit to form, as something that looks fine from one angle might look off from another. Once I’m satisfied with how it looks from both sides I move onto colors.
Darker colors and shaded areas should be more saturated! Bright colors can be lightened even further via desaturation! I picked this up from JackFly. Things in shade are more appealing when it’s slightly more saturated than the brights. And if you want to make a highlight on an already bright color, than desaturation can achieve that effect. As a side note, try slightly tinting the blacks and whites in your designs. This can add warmth or coldness to a design, and in my opinion, add more color harmony.
Adding creases can help detail clothing. I’m no rendering expert by any means. But adding a few creases in areas that bend a lot can help make your clothing look more like clothing and less like spray paint. Just a couple of ellipses in front or behind the elbow, the back of the knee, or the middle torso can make the fabric more real.
Shade the neck and the back of the head so you can model a jawline. I started doing this way before I did quarter views figures, and it helped a lot with defining my heads. Another tip is feminine jaws are soft and round while masculine jaws are straighter. Do what’s best for your character and get creative!
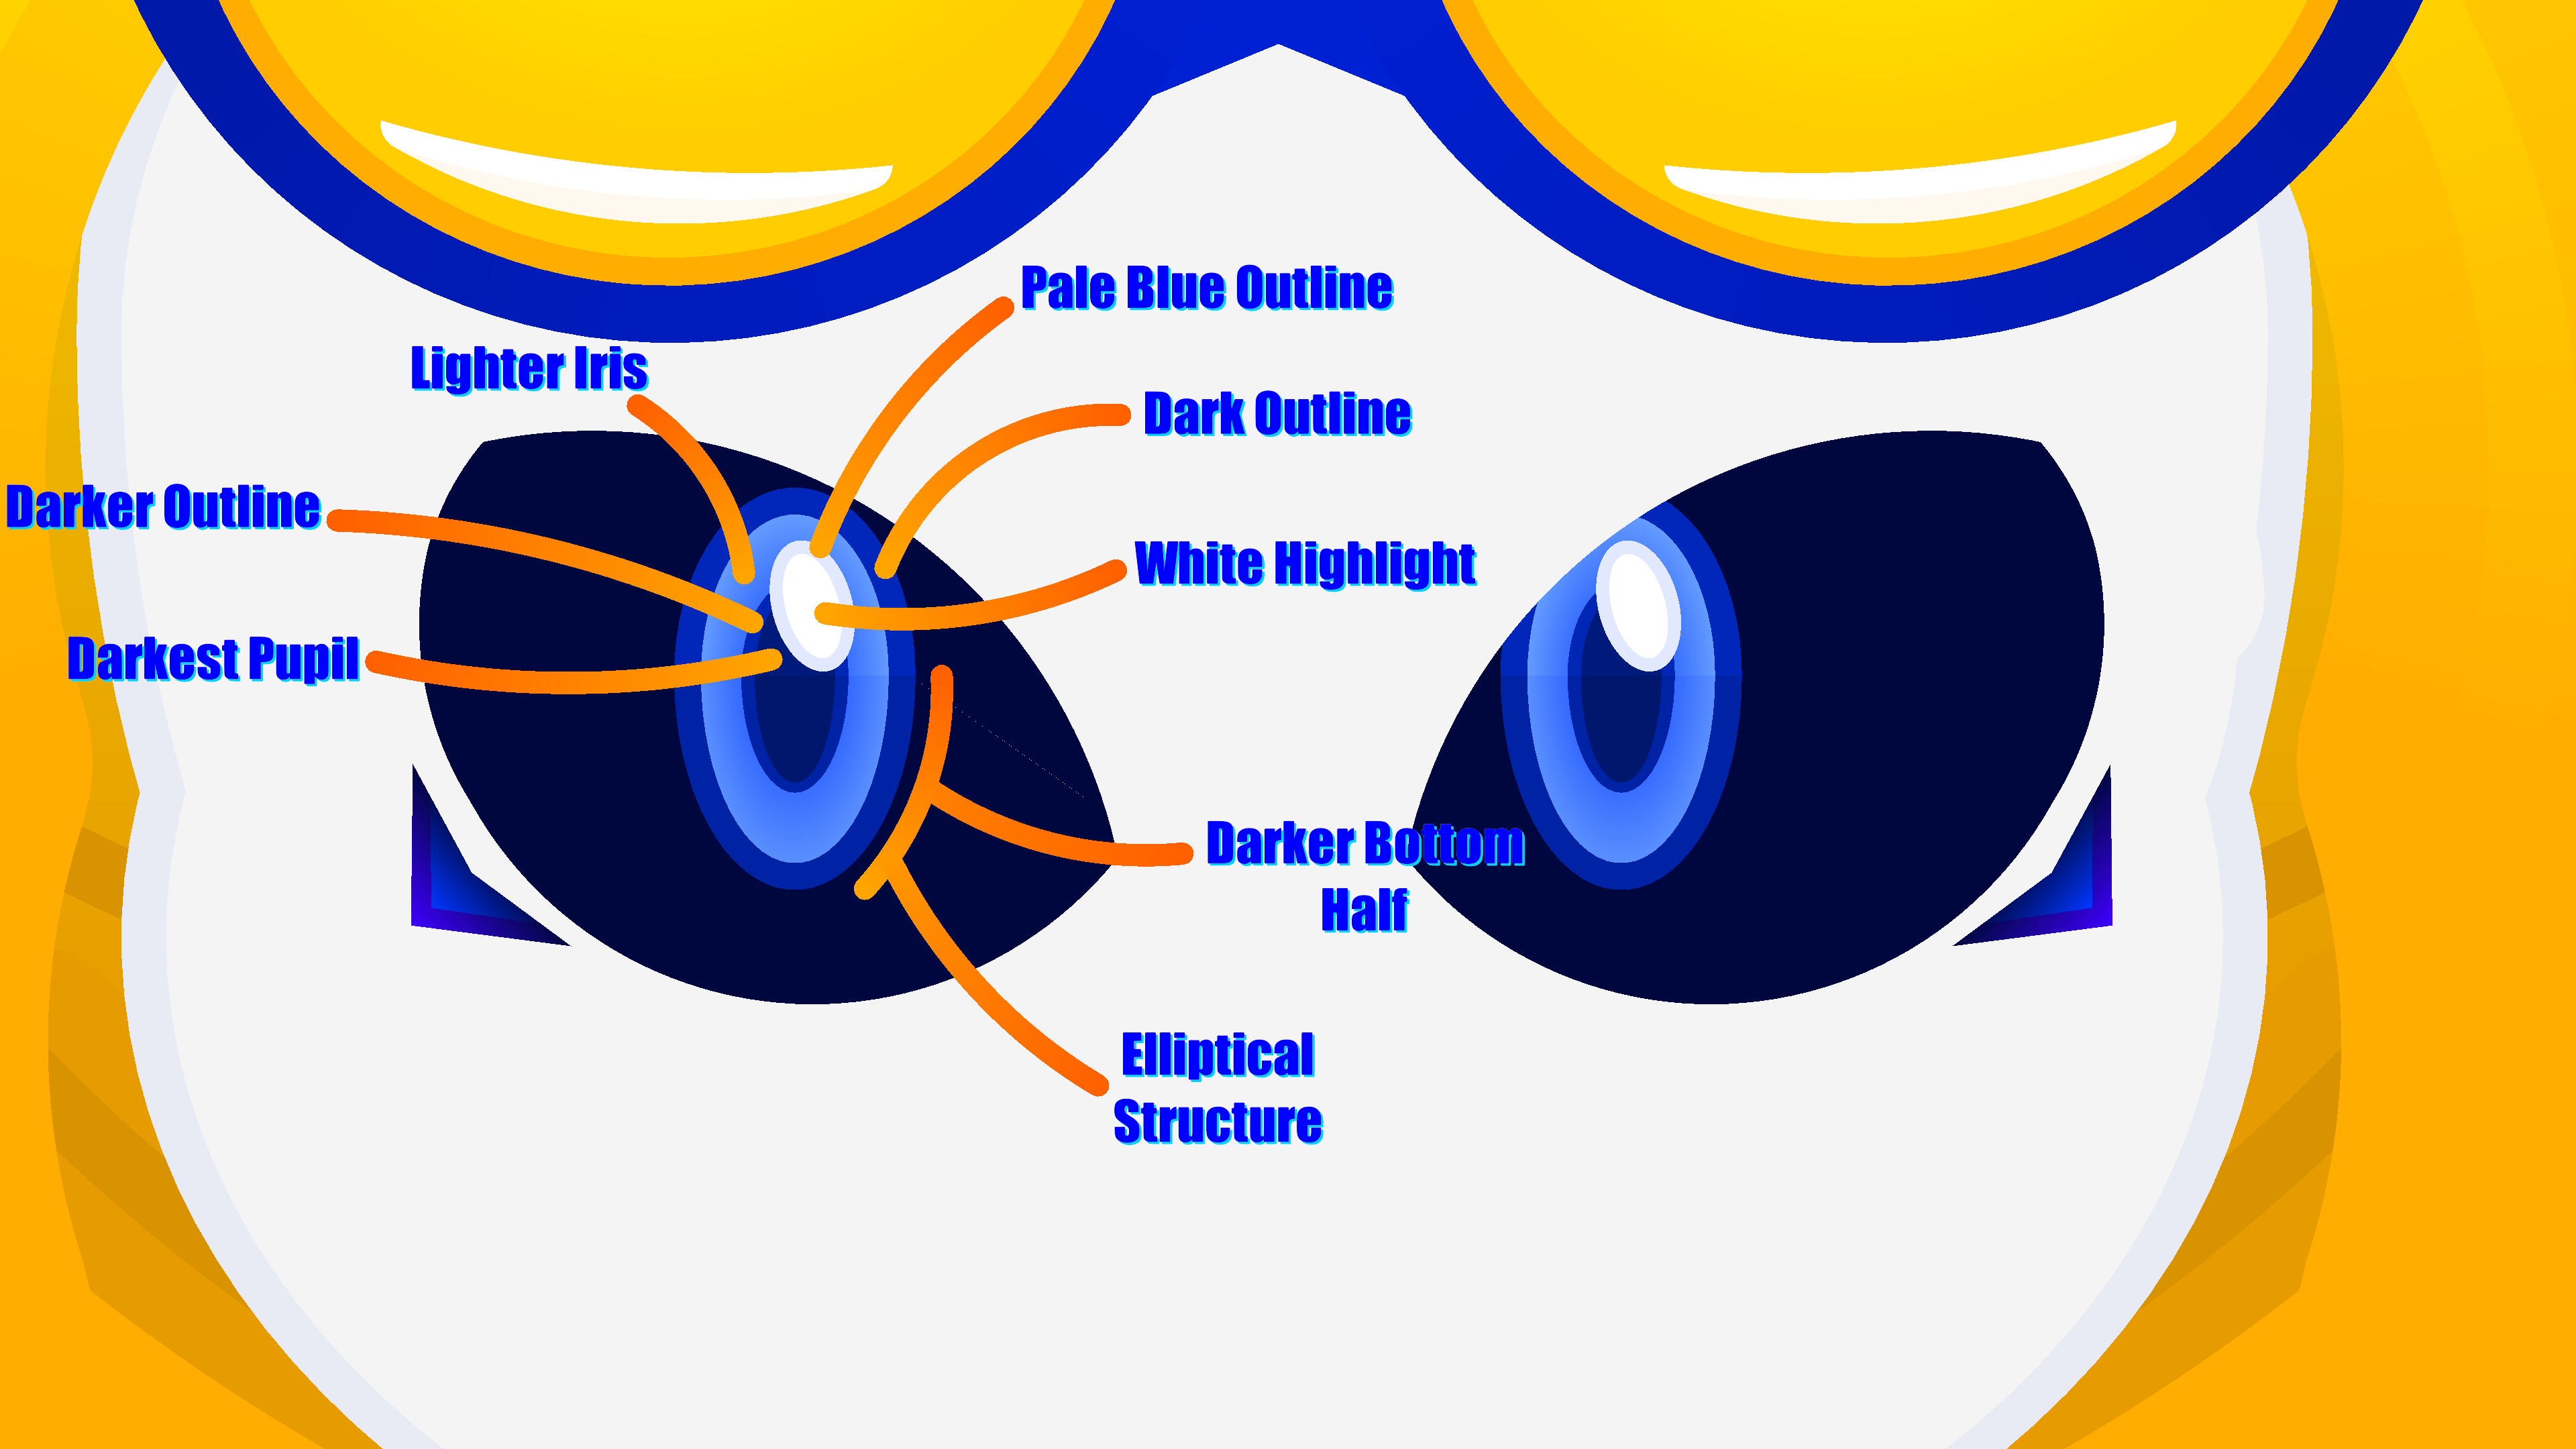
ADD A HIGHLIGHT TO YOUR PUPILS! Seriously, it adds so much life to my eyes. You’d have to see yourself to recognize how much of a difference a single white circle node can make to an eye. Doesn’t even have to be a circle either. If your character is more serious, maybe the circle can be replaced with a triangle. If they’re cutesy, you can add a bunch of circles. Hell, maybe your characters eyes are supposed to be lifeless, and in that case don’t add a highlight at all. Little details can make all the difference, and the eyes are the center of the face, so be unique with them!
And lastly
Quarters front, side, and quarters back views are enough for a decent turnaround. Obviously the addition of straight front and back views are preferable, but the three I mentioned are enough to make your character turn around convincingly, at least at higher frame rates.
A lot more I could go into, but this is pretty long already. Hope it helps!
Ah for fucks sake, there are good tips and tricks here that I use, and some that I don’t, and now I’ve realised that there’s a bunch of stuff I could’ve said for my own comment 😭
This has just became a competition who can prove they have the biggest brain
Damn you really take sn as an art program at this point with all the coloring techniques you mention lmao.
Now I wonder what kind of changes would make your colouring process easier.. 🤔
this is almost more of an art discussion in general rather than specifically stick nodes (regardless, very interesting, espcially with how great your characters always turn out)
Things in shade are more appealing when it’s slightly more saturated than the brights. And if you want to make a highlight on an already bright color, than desaturation can achieve that effect.
kinda hitting on the fact that, for shadows, don’t just make it a darker version of the color – rather, make it darker *and* blue-er , it gives it more “cold” feeling
similarly, do red/yellow-er for brighter colors
I’m not in the list, but I do have some things that usually help me.
The first thing i usually do for characters specifically is find what I believe to be the most reliable reference picture. For Eyelizabeth it was and still is a piece of art. For Red it was a side view of my lawbringer from For Honor, and for his next design it will be an image of a model i made in Heroforge.
i have 2 tips for during the creation process. the 1st isn’t so much a creation tip itself, but one that helps me make the process smoother. I’ve found that i get a lot more done if I have some sort of background noise… that isn’t music. Usually a youtube video. My second tip is to not be afraid to ask for help if you need it. You’ve seen this one in action from me before Arc. I’ve made it know secret that I kind of leach off of people when it comes to character making in SN. Red was (although mostly made by me) partially made by @boot2 and Drikette was mostly made by @thestewman. Quite frankly I’ve asked way too many people for help with my most recent in progress project, but that means that I’ve personally recognized that it’s okay to ask for help.
Okay that asking for help sounds interesting to try. Mainly cause I suck at the more detailed shit lmao.
This page has now become an encyclopedia.
legit bookmarked it in my notes for SN PC lol
Okay, lightning round of Mellow’s tricks
USE CURVED NODES FOR (some of) YOUR LIMBS! Especially, in my case, for legs.
Seriously, something as simple as this can save you plenty of time trying to get the right shape down.
Add a trapezium and voilà, you got yourself a leg
What else is there? Oh yeah, trapezoids act funny when it comes to their top ratio, having an invisible 3rd decimal that allows for extra precision.

This here is the difference between 0.50 and 0.505
It’s very slight, but you can tell that there’s stuff going on.
Another thing that Lemon once told me is that using the segment scale factor along with segment curving allows for some even more particular arcs. Rather than having a segment with 1.00 Segment Scale, 50 Thickness, 50 Length and 2 Curvature, you should divide that segment scale by 2 or its multiples and multiply those other values by the same amount to get what you want
I’m sure everyone has come across this with their rounded segments. It’s got a gradient, and the length is set to 0. Why not make some use for it? Save some nodes and do this rather than relying on two semi-ellipses

On the design side of things, when it comes to my more detailed eyes, this is usually how I create them.
You don’t have to follow this exactly, but use it as a reference perhaps if you struggle
me trying to think of more information to dump
This post will be a place a long time in the future, where new users can come to understand our ancient knowledge, and add new knowledge for future users to possess.
*casually deletes the post*
back in the day it was like a circle with a really thin different colour segment in the middle. I used if for things such as screws.
Lmfao @ralph how the hell did u miss a 3rd decimal
I genuinely can’t tell if it’s intentional or not
0.540.5.99
what are we doing IP addresses out here
this was without a doubt the biggest page of any post I’ve ever seen… My head can’t process the information
Wasnt expecting a mention I assumed that I was irrelevant enougj to be forgotten
1) I dont really do actual prep or planning. I just decide if I want to make a stickfigure based on whatever I find interesting and its design depends on what I feel like doing though I do get some references if I get stumped (unless if its a realistick then I crank up the tracing)
2) Aside from abusing and tracing gradients solely for clout and features🥵, I abstain from polyfills, use very thick segments to fill up large spaces, trapezoid abuse, etcetc (tldr I attempt to optimize) Other than that I dont have much “tricks” or “cheats” and my overall habits (going w/ the flow and further optimizing afterwards) havent really changed since the filled circle days aside from being adapted for high detail stickmsking
Probably an anticlimactic answer but my passion is dead (took me around 5-6 hours over a year to make my recent stickfigure compared to over 3 days or a week in the past) and Ive forgotten many of my specific habits in the past
+ Also keep the main nodes of a multi-stickfigure creation centered until the end for overall consistency if thats even worth noting